Mylos

Windows configuration management

The key to running a reasonably reliable Windows system is configuration management. A typical Windows will have tens of thousand of files and hundreds of software components installed. It’s a numbers game: the more components interacting on the system, the greater the probability that two of them will conflict.

Windows gets a lot of heat from Unix zealots (I am one myself) for being unreliable, but any operating system that attempts to comprehensively support all the wide variety of oddball peripherals and software out there is going to experience the same integration problems; certainly, Linux is converging towards Windows in terms of the number of security advisories released. Of course, using an obsolete version like 98 or ME without modern protected memory is a prescription for disaster, but the NT-based versions, i.e. 2000 and XP can have reasonable reliability, at least for desktop usage.

The rest of this article describes my strategy minimizing entropy in my Windows systems.

Separation

The way I approach my Windows configuration is to establish a clear separation between Operating System/Applications and Data.

The OS and Applications do not mean anything special to me other than the amount of work required to reinstall. Data represent actual productive work on my part and must be protected. I separate OS/Applications from data clearly, and make regular checkpoints of OS/Apps after installation and every now and then before I make major changes like installing an application or OS service packs. If my system becomes unstable at some point in time, I can easily revert to a known stable configuration.

The specific tools used to provide this backup of system configuration are a question of personal choice. A number of commercial software like Roxio GoBack or Powerquest SecondChance (since discontinued) purport to do this, as does Windows XP.

I personally don’t trust these programs all that much, and prefer to make a total backup of my system using Norton Ghost. To ensure my data is not erased when I restore from a Ghost image, I have at least two partitions on each of my systems:

  1. C: for Windows and applications (NTFS)
  2. D: for my personal data (NTFS on desktops, FAT32 on laptops)
  3. I: for my Ghost images on desktops (FAT32), on a different drive than C: so I can survive a drive failure

That way I can destroy C: at my leisure, in the worst case I will have to reinstall a couple of applications and reapply some settings that were lost since the last release. My data sits safely on the D: partition (and backups).

Backup strategy

I don’t trust CD-R media or removable drive cartridges for backup purposes, and tape is either too slow or too expensive in the case of DLT. I keep full duplicates of my data partition and some Ghost images on a pair of 100GB external FireWire drives, one I keep at home and one at work. I rotate them weekly so even if my house burns down I will have lost in the worst case only a week of work or photos.

Limitations of this method

This technique doesn’t work very well if the underlying hardware configuration changes too often, and assumes a linear install history. If I install software A, then B, then C, I can go back from A+B+C to A+B or A but not to A+C.

How-to

This section shows how to extricate the data from OS/Apps which Windows and most apps usually try and commingle. The TweakUI utility from Microsoft is an absolute must-have. It is a control panel that allows you to change the behavior of the OS in vital ways that are not accessible otherwise short of editing the Registry directly.

Outlook

Outlook files are the single largest data files on my system (Ghost images do not count). By default, Outlook will create its PST file in the Documents and Settings directory. You can either relocate this directory to the D: partition, or create a new PST file in a location of your choice and use Advanced properties in the properties dialog for the PST in Outlook to make it the default location for POP delivery, after which you can close the old one and delete it.

My Documents

And derivatives like “My Pictures”, can be relocated to D: using TweakUI.

Favorites

For IE users, TweakUI allows you to relocate the Favorites directory to another place than the default. This way, you will not lose your favorites when you have to restore your system.

For Netscape/Mozilla users, the Profile manager utility allows you to set up a new profile with files that are stored where you want, e.g. on the D: partition.
Nikon D100 tests

I got my father a Nikon D100 digital SLR for his birthday. I tested it for a couple of weeks beforehand, and have posted some tests. There is a small gallery of macro shots, and an informal comparative test of three normal lenses.

How to make long flights more bearable

I just returned from a cousin’s wedding in Houston. One very effective way I found to make the flight bearable is to carry an Apple iPod MP3 player with a pair of Sony MDR-NC10 noise-canceling earbuds.

The iPod holds hundreds of CDs’ worth of music (without being interrupted constantly by the PA) and its lithium-ion battery lasts enough for a Paris-San Francisco flight. The Sony earbuds cancel noise passively (as ear plugs) and actively through destructive interference, and reduces engine noise to a low hum, so even pianissimo passages in classical music are audible.

Updated (2004-04-02):

I have trouble making the Sony earbuds stick in my ear, they have a tendency to work their way loose. I have switched to a better solution, the Etymotic ER-4P earphones reviewed here.

Site redesign

I’ve redesigned the site with a custom template based on Bryan Bell’s Moveable Radio Modern. Why the stark black and white design? Because when there are large colored areas in a layout, the perception of colors is skewed, not a good thing when you have many photos on a site.

A tale of three lenses

Introduction

This is a quick and semi-scientific comparison of three normal prime lenses for the Nikon system:

Why these three lenses? Simply because I happened to have them on hand. The 45mm is the lens I use on my FM3A (see also my Epinions.com review), the 60mm macro is the lens I bought along with a D100 for my father, and the 50mm f/1.8 (non-D) is the normal lens I used to have on my old N6006, before I sold it off on eBay (and gave the lens away to a friend who lent it back to me for the purposes of this test).

Construction

The 45mm and the 60mm are both very well constructed in metal, to the same standard as old AI-S lenses. The 50mm is the cheapest lens in Nikon’s line, and it shows: the barrel is plasticky (and the silk-screened focal length has actually partly worn off).

The 45mm and 60mm both have well-damped manual-focus rings without play. The 50mm has a loose focus ring. The 45mm and 50mm are both quite light, the 60mm is a more substantial and heavier lens (but I think it balances better with the D100 body).

The 45mm is a Tessar, a lens design invented exactly one century ago by Paul Rudolph of Zeiss. It is supplied with a compact lens hood and a neutral filter to protect the lens. Interestingly, the “real thing”, a Contax 45mm f/2.8 Tessar T* by Zeiss is actually cheaper than the Nikon copy…

The 60mm has a deeply recessed front element that comes out as you crank the helical for close-up and macro shots. The concentric inner barrels rearrange their relative position as well, due to the internal focus design which allows the lens to be used both as a macro and a general standard lens. For general photography, no lens hood is needed as the lens body itself acts as one.

Sharpness

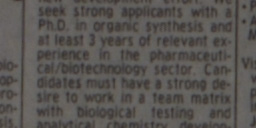
To test lens sharpness, I taped a page from the classified ads section of the Sunday paper to a wall, and lit it with a cheap Ikea halogen lamp. I then set up a Gitzo 2227 tripod with an Arca-Swiss B1 ballhead and shot the newspaper. I tried to use the same framing as much as possible to keep the shots comparable. Before running the tests, I applied a custom white balance using a standard 18% gray card. The shots were all taken with a 2s self-timer and the mirror vibration reduction function activated. The 50mm and 60mm were focused with AF, the 45mm was focused manually with the D100’s focus assist “electronic rangefinder”. The NEFs are “compressed NEFs”, around 4MB each.

You have to take this test with a grain of salt, as I had no way to make sure the camera axis was precisely perpendicular to the wall, whether the wall itself is flat and if the newspaper lay really flat against the wall. Furthermore, as I had to move the tripod to keep the framing identical across different focal lengths, I may have introduced subtle shifts in the tripod. To make this more usable, I am attaching below a table of 256×128 crops taken at the corners and center of the frame.

Lens sharpness test crops
Position60mm f/2.8D AF Micro-Nikkor50mm f/1.8 AF Nikkor45mm f/2.8P Nikkor
Top Left
Top Right
Center
Bottom Left
Bottom Right

The differences between the lenses are subtle, and certainly within the error margin for the experiment, but all the lenses show excellent sharpness without fringe chromatic aberrations or the like.

Bokeh

Bokeh is the Japanese word to describe how out-of-focus highlights are rendered. It is principally controlled by the shape of the lens diaphragm. All three lenses have a seven-blade diaphragm, but only the 45mm’s blades are rounded.

Out-of-focus highlights (Bokeh)
LensJPEGNEFCrop
45mm f/2.8P Nikkor @ f/8DSC_0045.jpgDSC_0045.NEF
45mm f/2.8P Nikkor @ f/2.8DSC_0043.jpgDSC_0043.NEF
60mm f/2.8D AF Micro-Nikkor @ f/2.8DSC_0038.jpgDSC_0038.NEF
50mm f/1.8 AF Nikkor @ f/2.8DSC_0036.jpgDSC_0036.NEF
50mm f/1.8 AF Nikkor @ f/1.8DSC_0037.jpgDSC_0037.NEF

At the largest aperture, the aperture is usually constrained by a circular portion of the lens barrel rather than by the diaphragm, which explains why the bokeh of the 50mm lens is significantly better at f/1.8 than f/2.8. The next table shows the incidence of aperture on the shape of out-of-focus highlights:

Out-of-focus highlights (Bokeh)
Aperture60mm f/2.8D AF Micro-Nikkor50mm f/1.8 AF Nikkor45mm f/2.8P Nikkor
f/1.8
f/2.8
f/3.3
f/4
f/5.6
f/8

The 50mm’s out-of-focus highlights have a hard heptagonal shape beyond f/2.8, as do the 60mm beyond f/4. The 45mm clearly benefits from its rounded diaphragm blades.

Flare control

Not tested yet.

Barrel distortion

Not tested yet.

Real-world image tests

Click on any thumbnail to enlarge. ISO200 unless stated otherwise
45mm f/2.8Pf/2.8
1/4000s
NEF
f/2.8
1/90s
NEF
f/8
1/60s
NEF
f/2.8
1/500s
NEF
60mm f/2.8 AF Macrof/2.8
1/4000s
NEF
f/2.8
1/80s
NEF
ISO400
f/4
1/60s
NEF
50mm f/1.8 AFf/2.8
1/4000s
NEF
f/2.8
1/100s
NEF
f/1.8
1/320s
NEF

Summary

Lens summary
Criterion60mm f/2.8D AF Micro-Nikkor50mm f/1.8 AF Nikkor45mm f/2.8P Nikkor
PriceReasonableCheapExpensive
Build qualityExcellentMediocreExcellent
SharpnessExcellentExcellentExcellent
BokehGoodFairExcellent

Conclusion

The 45mm f/2.8P Nikkor is clearly an excellent lens, and not just a retro head-turner. Unfortunately, it is rather expensive for what you get compared to the 60mm f/2.8D AF Micro-Nikkor (no AF, no macro capability). The 50mm f/1.8 AF Nikkor has less pleasant out-of-focus highlights than the other two, but it is remarkably sharp and one quarter the price. If the construction is an issue, the famous 50mm f/1.4D AF Nikkor (not tested as I don’t have one on hand) is also an excellent choice.

In any case, any of these lenses is an excellent performer that brings the best out of a Nikon camera, and no photographer’s camera bag should be without one.

Learning more

Here are a few good sites to learn more about Nikkor lenses:

Bjørn Rørslett is a nature photographer with reviews on quite a few Nikkor lenses.

Thom Hogan has a lot of instructive material on the Nikon system, including lens reviews.

Ken Rockwell has many opinionated reviews on Nikkor lenses (sometimes entertaining, sometimes infuriating). How he has the chutzpah to review lenses he has never held in his hands continues to elude me.

For French readers, Dominique Cesari has his take on Nikkor lenses.

The Nikon historical society in Japan has an interesting series, 1001 nights of Nikkor, with the back story on lens design.

Stephen Gandy’s CameraQuest website has reviews on some exotic Nikkor lenses on his Classic Camera Profiles page.